


Estimated reading time: 11 minutes
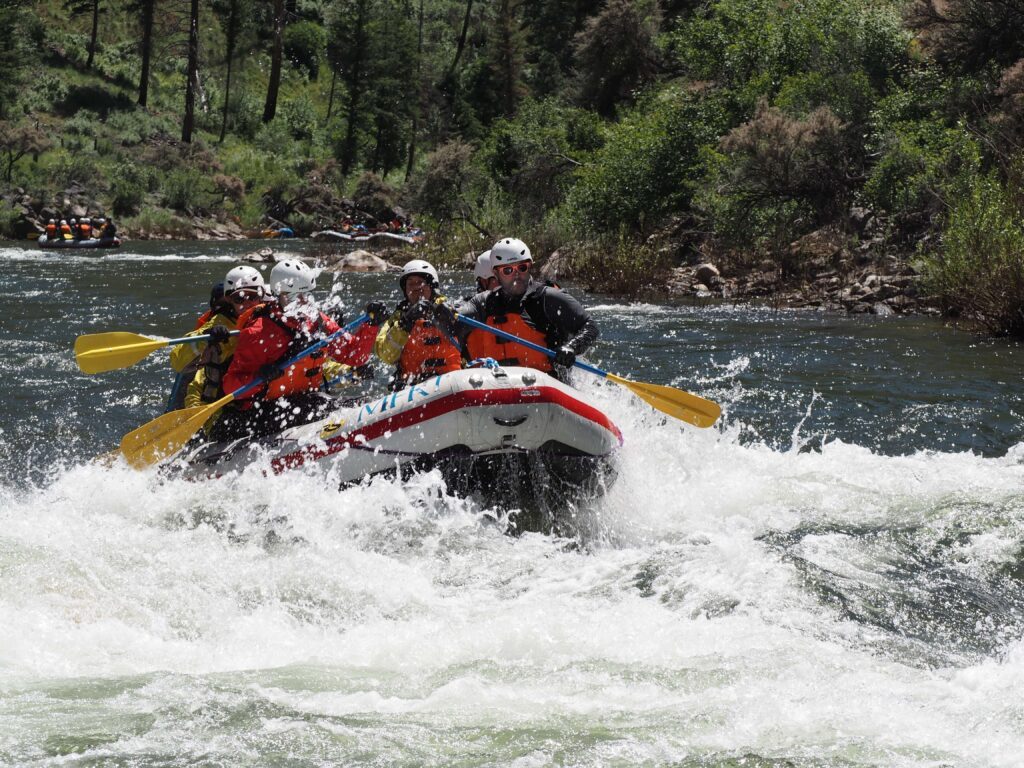
The Middle Fork gives photographers a rare combination of moving water, changing canyon light, active boat scenes, wildlife, camp life, and clear night skies. It also gives camera gear a demanding working environment: splash, sand, heat, cold mornings, limited luggage space, and days away from a normal charging routine.
The best camera for a Middle Fork trip is not necessarily the most capable one you own. It is the system you can protect, reach when conditions are appropriate, and power for the full trip without distracting you from guide instructions or the experience itself.
This guide helps you choose that system, pack it into the dry bags MFRT provides, estimate your battery needs, and decide when to shoot or keep the camera stowed.
River Photography at a Glance
| Camera option | Best fit | Main advantage | Main tradeoff |
|---|---|---|---|
| Phone | Travelers who want one small, familiar device | Fast access and no separate camera kit | Battery also supports communication, travel, and other personal needs |
| Rugged or waterproof compact | Frequent shooting around splash, sand, and shorelines | Small size and fewer protection steps | Less control and image quality than a larger system |
| Action camera | Rapids, wide-angle video, and hands-free perspectives approved by the guide | Compact, durable, and built for motion | Small batteries and a very wide perspective |
| Interchangeable-lens camera | Photographers who value file quality and manual control | Strong low-light performance and lens choice | More bulk, more power demand, and greater water/grit exposure |
For many guests, a phone or one compact camera is enough. A serious photographer can bring an interchangeable-lens body, but one versatile lens usually creates a more usable river kit than several lenses and accessories.
Choose What Earns Space in Your Day Bag
MFRT currently provides a large 85-liter dry bag for overnight gear and a smaller 15-liter daytime-access dry bag. The small bag is the practical home for a camera you may use between camps. The full Middle Fork rafting packing list owns the complete personal-gear and luggage guidance; use it to balance camera equipment against clothing, medication, sun protection, and other essentials.
Start with the pictures you care about most:
- A phone or waterproof compact works well for travel memories, landscapes, camp, and quick portraits.
- An action camera is useful when motion and spray are the subject.
- A larger camera earns its space when you specifically want better low-light files, manual control, or a focal length your smaller device cannot provide.
Then simplify. One body, one mounted lens, spare batteries, enough memory, and a cleaning cloth are a strong core kit. A second body, multiple lenses, a tripod, a laptop, or a hard case may be valuable for a professional assignment, but they also add weight and take up limited dry-bag space. Discuss bulky or unusual equipment with MFRT before arriving in Stanley, especially when the trip may involve a backcountry flight.
Whatever you choose, practice before the trip. Know how to change exposure compensation, switch between stills and video, lock focus, disable unnecessary wireless features, and find a battery or memory card without unpacking the entire kit.
Build Protection in Layers
A dry bag is part of a protection system, not permission to ignore water. Closures must be clean and rolled correctly, bags can be opened at the wrong moment, and camera gear can still be damaged by grit or impact inside a bag.
Use three layers:
- Camera-level protection: Use the device’s weather sealing, a fitted rain cover, or a simple protective sleeve appropriate to the camera. Weather-resistant does not mean waterproof.
- Impact and grit protection: Place the camera in a compact padded insert or wrap that fits inside the day dry bag. Keep loose batteries and cards in small cases so they cannot collect sand or strike the camera.
- River-bag protection: Put the protected kit inside the MFRT day dry bag and close it exactly as the crew demonstrates.
Test the complete setup at home. The padded insert must fit without preventing the dry bag from closing properly, and the bag still needs room for the personal items you require during the day.
Keep the Working Kit Clean
Fine sand can reach buttons, card doors, lens mounts, and cleaning cloths. Open the camera bag on a stable, reasonably clean surface and keep the closure area free of grit. A soft brush or blower can remove loose particles; rubbing sand with a cloth can scratch a lens or screen.
Avoid changing lenses in a raft. If a change is important, wait for a calm, appropriate stop, move away from splash and loose sand, and keep the camera opening exposed for as little time as possible. Never rinse a camera or lens with river water.
Secure Gear Without Creating a Hazard
Do not clip a camera, pole, or strap to a raft, PFD, helmet, or your body without guide approval. A leash that prevents loss in calm water can become an entanglement hazard in a rapid. The guide decides what can be accessible in each boat and when it needs to be fully stowed.
Keep straps short and controlled. A small floating strap may be useful for a waterproof compact when the guide approves its use, but it does not make an unprotected camera safe around water.
Make a Battery Plan Before You Leave
Do not build the trip around finding an outlet. Instead, arrive with enough charged capacity for the full itinerary and treat any crew-approved charging opportunity as a bonus unless MFRT has confirmed a current arrangement for your departure.
A simple usage test is more reliable than a generic battery-count rule:
- Use the camera for a normal full day at home, including the amount of video, screen review, wireless transfer, and night shooting you expect.
- Record the percentage or number of batteries consumed.
- Multiply that daily use by the number of river days on your itinerary.
- Add a reserve for cold mornings, an unusually active day, or a battery that underperforms.
For example, if a realistic test uses about half of one camera battery per day, a six-day itinerary represents three batteries of expected use before adding a reserve. Your result will differ: video, stabilization, GPS, wireless connections, long exposures, and frequent screen use can change consumption dramatically.
Repeat the same exercise for a phone and action camera. A power bank’s advertised capacity does not transfer perfectly to a device because voltage conversion and charging create losses. Test the actual combination of power bank, cable, and device before the trip rather than relying only on the label.
Pack Lithium Batteries for the Flight Too
Camera batteries and power banks also have air-travel rules. The current FAA lithium-battery guidance requires spare lithium batteries and power banks to travel in carry-on baggage, with terminals protected against short circuits. If a carry-on is checked at the gate or planeside, remove them first.
Most consumer camera batteries and power banks fall at or below the FAA’s 100-watt-hour limit, but check each label. Batteries from 101 to 160 watt-hours require airline approval and are limited to two spares; larger batteries are prohibited on passenger aircraft. Airlines may apply stricter rules, and damaged or recalled batteries should not travel.
Keep each spare in its original case, a battery case, or a separate protective pouch. Do not let batteries share a pocket with keys, coins, or other metal. Carry the correct cables, inspect them before departure, and leave swollen, cracked, or unreliable batteries at home.
Stretch Each Charge on the River
Small habits preserve meaningful power without making photography feel restrictive:
- Use airplane mode when the device does not need a connection.
- Turn off automatic uploads, Wi-Fi, Bluetooth, GPS logging, and always-on displays you will not use.
- Shorten screen-review time and lower screen brightness when conditions allow.
- Favor short, intentional video clips over continuous recording.
- Keep batteries out of direct sun and away from water.
- In cool conditions, carry a spare in a protected inner pocket until needed.
- Rotate memory cards rather than spending battery power reviewing and deleting files in the field.
Create a simple evening routine: stow the camera dry, check the next battery, confirm remaining card space, and return everything to the same protected location. Do not charge or leave electronics in shared camp areas without asking the crew where they can be handled safely.
A phone deserves an extra reserve. Even without cellular service on the river, it may hold travel details, books, notes, or important information you will need after takeout. Saving a small amount of power for the return journey is more useful than using the final charge on redundant video.
Know When to Shoot and When to Stow the Camera
The guide’s safety direction always comes first. The practical day-on-the-Middle-Fork schedule explains why gear access changes through launches, rapids, stops, and camp transitions.
Rapids and Moving Boats
Ask before taking a camera out and put it away promptly when directed. A rapid that looks manageable from the boat may require everyone to paddle, hold on, or maintain a specific position. Never stand, change seats, or reach outside the boat for a composition without permission.
An action camera does not make every mounting position safe. Let the guide approve mounts and attachment points, and make sure no pole, leash, or strap interferes with paddling, handholds, rescue equipment, or another guest.
From shore, choose a stable position well back from the water and follow directions about where the group can wait. A moderate shutter speed can preserve motion in the water; a faster one can freeze spray. The right choice depends on the photograph and available light.
Landscapes, Camp, and Night Sky
Canyon light changes quickly. Expose for important highlights, shoot a steady sequence only when the scene warrants it, and look behind you—the reflected light on the opposite wall can be more interesting than the direct sun.
In camp, ask people before making close portraits or photographing private moments. Keep kitchen, loading, and camp paths clear. A small support or stable surface may help with night photographs, but place it only where the crew says it will not become a trip hazard or disturb the site.
For stars, begin with manual exposure, a wide aperture, a higher ISO, and a shutter time short enough to keep stars reasonably sharp. Make a test frame and adjust from the actual result. Use a headlamp’s red mode or low setting when possible, and avoid sweeping bright light across tents or other guests.
Wildlife, Fish, and Cultural Places
A photograph is never a reason to crowd an animal. Leave No Trace recommends observing wildlife from a distance and never following, approaching, or feeding it. If your presence changes an animal’s behavior, back away. A longer focal length is useful only when it helps you maintain that distance.
At pictographs, cabins, and other sensitive places, follow guide instructions about paths, distance, touching, and photography. The Middle Fork side-hikes and historic-sites guide explains why precise locations and some images require care. Leave objects where they are; do not move an artifact or natural feature to improve a picture.
If fishing is part of your trip, fish welfare comes before the photograph. Keep hands wet, minimize handling and air exposure, and be ready before lifting a fish. The Middle Fork fish identification and ethical-handling guide owns the full handling guidance.
Drones are not an option on the wilderness river. The current Middle Fork permit page states that drones are prohibited in Wilderness Areas, so leave one at home.
A Compact Before-Stanley Checklist
- Choose one primary camera system and define the pictures it is meant to make.
- Test the camera, lens, battery, card, cable, and power-bank combination.
- Estimate daily consumption for every device and add a reserve.
- Protect spare batteries from water, impact, and terminal contact.
- Test-fit the padded camera insert inside the 15-liter day dry bag dimensions.
- Confirm that the kit fits current MFRT luggage guidance.
- Label small cases and bring enough reliable memory for the full trip.
- Learn the controls you will need without a manual or internet connection.
- Ask MFRT in advance about bulky professional equipment or a special power requirement.
- Plan to follow the guide’s decisions about access, mounts, rapids, wildlife, and sensitive sites.
Middle Fork River Photography FAQ
The best choice is the smallest system that can make the photographs you care about and that you can protect and power confidently. For many guests that is a phone, waterproof compact, or action camera. Bring a larger interchangeable-lens camera only when its control or image quality justifies the extra space and care.
Use the provided day dry bag as one layer, not the only layer. Put the camera in a compact padded insert or wrap, protect small parts from grit, keep the closure clean, and close the dry bag as the crew demonstrates. No bag should be treated as a guarantee against water, impact, or user error.
Base the number on a realistic day of your own use. Multiply that consumption by the river days on your itinerary and add a reserve. Video, wireless features, cold conditions, screen time, and battery age make a fixed recommendation unreliable.
Plan as if you need to carry all required power. Do not assume an outlet or shared charging system will be available unless MFRT confirms it for your departure. If you have a medical, accessibility, or professional power need, discuss it with the office before the trip.
Only when the guide says conditions and your boat role allow it. Some sections require paddling, holding on, or keeping every loose item stowed. Do not attach a camera or leash to a raft, PFD, helmet, or your body without guide approval.
No. The Middle Fork travels through designated wilderness, and the current permit page states that drones are prohibited in Wilderness Areas. Leave the drone at home.
Bring Home the Story, Not a Burden
A compact, rehearsed system usually produces more photographs than an ambitious kit that is difficult to reach or protect. Choose the pictures that matter, test your power plan, give every item a secure home, and let guide direction determine when the camera comes out.
If you have questions about dry-bag fit, unusually bulky equipment, or a special charging requirement, contact Middle Fork Rapid Transit before arriving in Stanley.